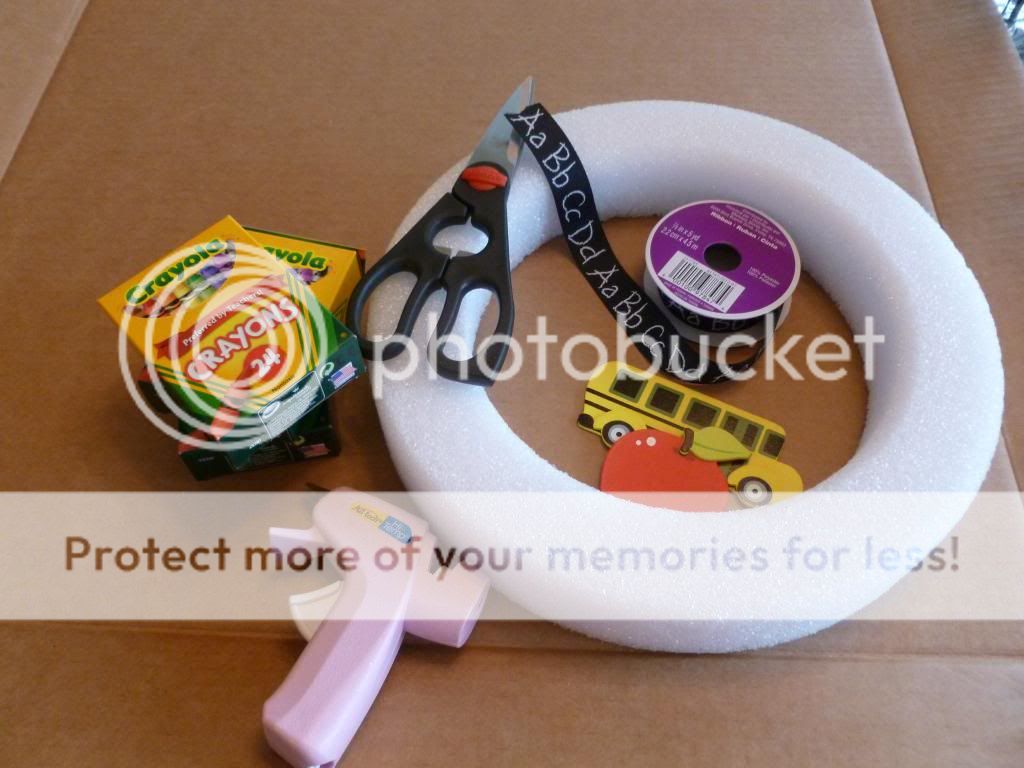
Supplies Needed:
Piece of cardboard
Wreath form or circles for tracing
Glue Gun
Scissors
3 boxes of 24 crayons (I got mine at Staples for $.25 each)
Ribbon for hanging the wreath
Wood School Theme pieces for accents
First, I used the wreath form to trace the inner ring and outer ring onto the cardboard. A lot of people on pinterest used embroidery rings as a base but I didn't want to spend any more money or make another trip to the store.
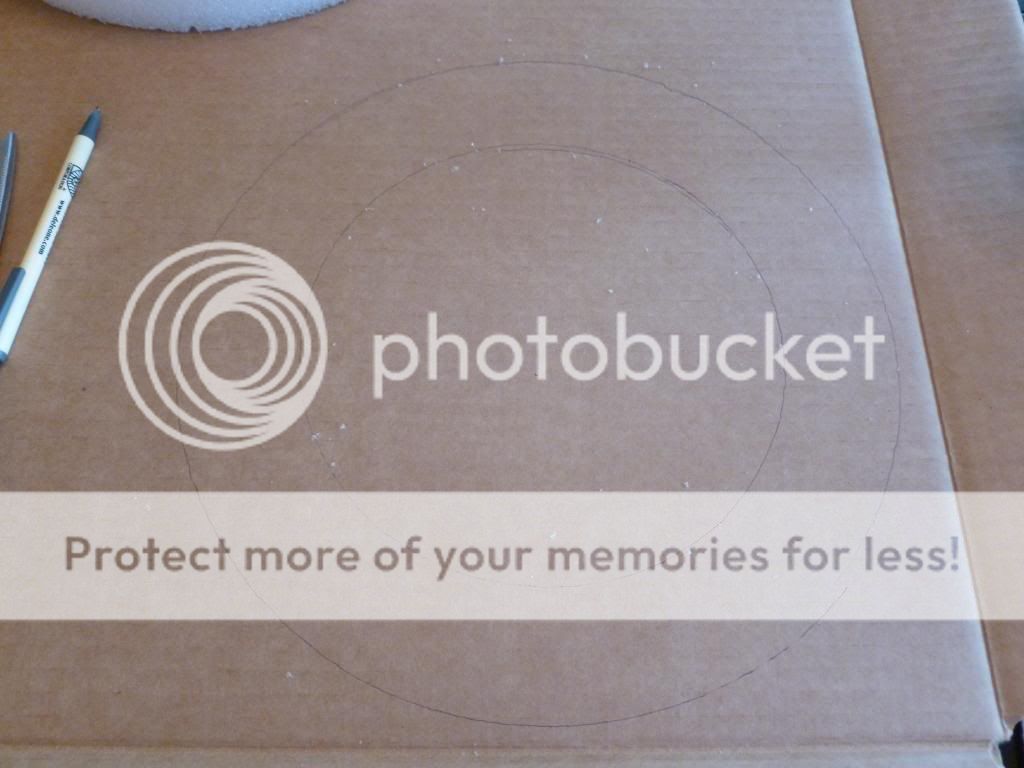
Next cut out the circles to form the base for the wreath.

Then I started gluing the crayons around the wreath. I made sure to run a strip of glue in the middle of the crayon on the back so that the Crayola logo was showing.

Keep gluing the crayons around the cardboard wreath form. I had no pattern to it - I just made sure no two colors were next to each other. And it is okay if there is spaces because we are going to fill them in.

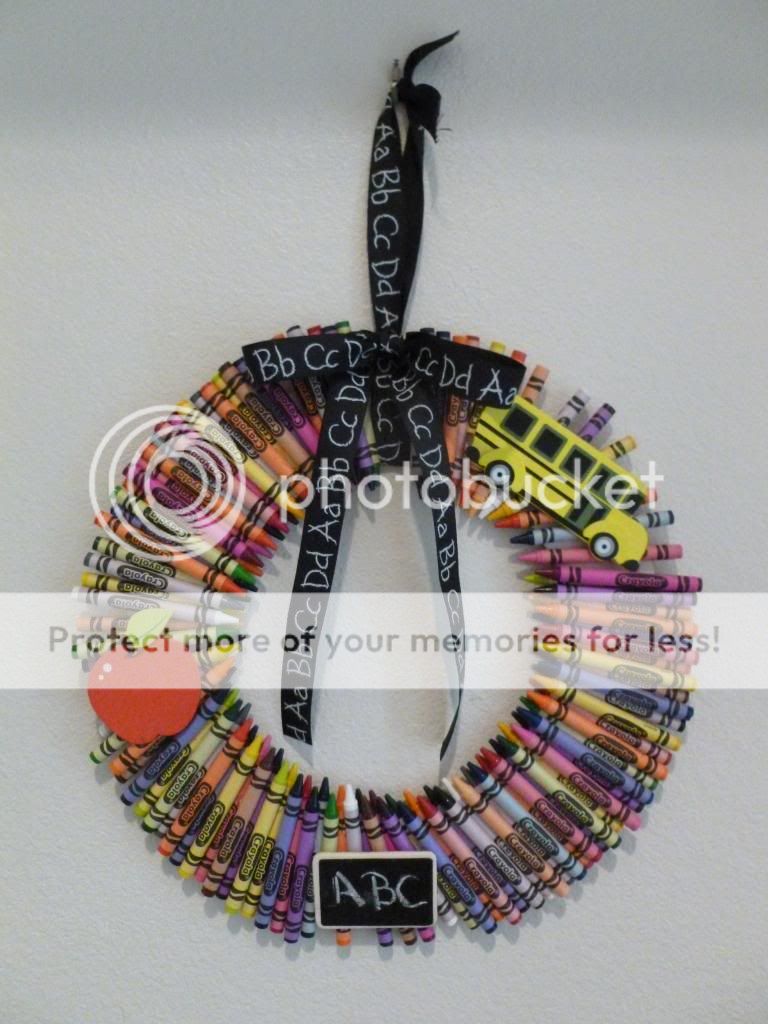
Once I had gone all the way around the cardboard wreath, I went back and filled in the smaller spaces with another crayon glued on top to create a second layer.

Next, use your wood accent pieces to cover some of the larger spaces created when layering the crayons.

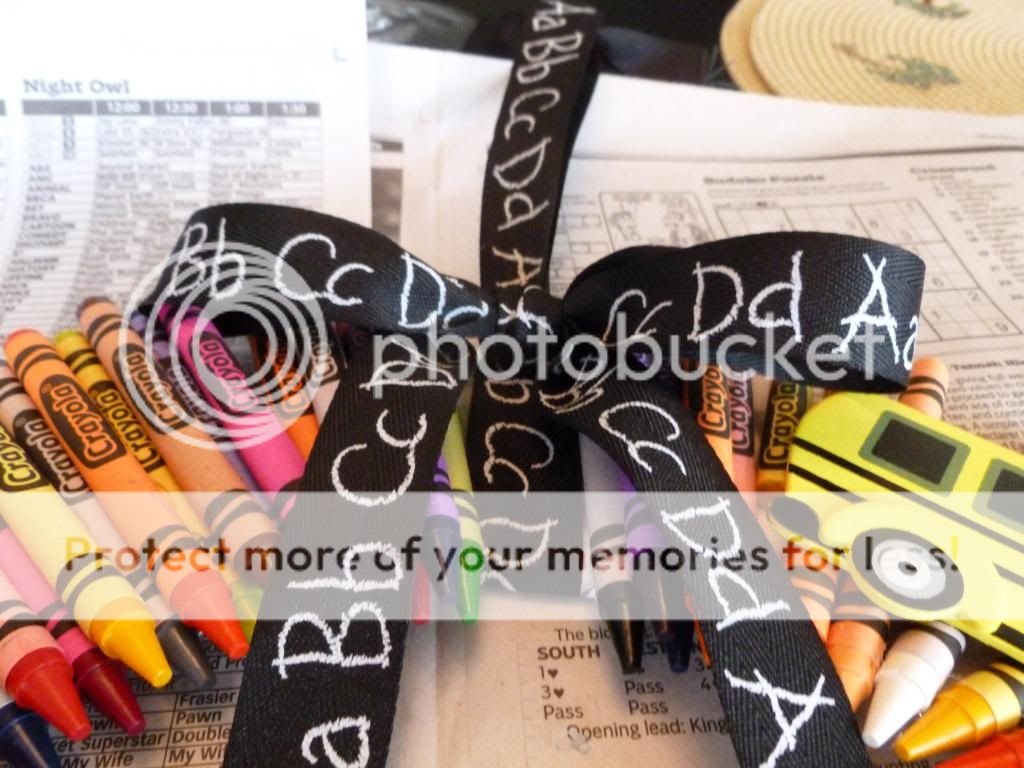
I used a wooden apple and bus purchased pre-painted at a local craft store for around $.59 each. Then I used a mini chalkboard I found in my craft stash and wrote "ABC" on it. In another larger space I strung some leftover "ABC" ribbon for hanging.

Once the ribbon is strung, tie in a double knot making a loop for hanging. Then create a bow around the loop to finish it off.
And that's all there is too it. I hung it in my alcove and will reveal the rest of the decorations in another post so stay tuned!!
No comments:
Post a Comment